
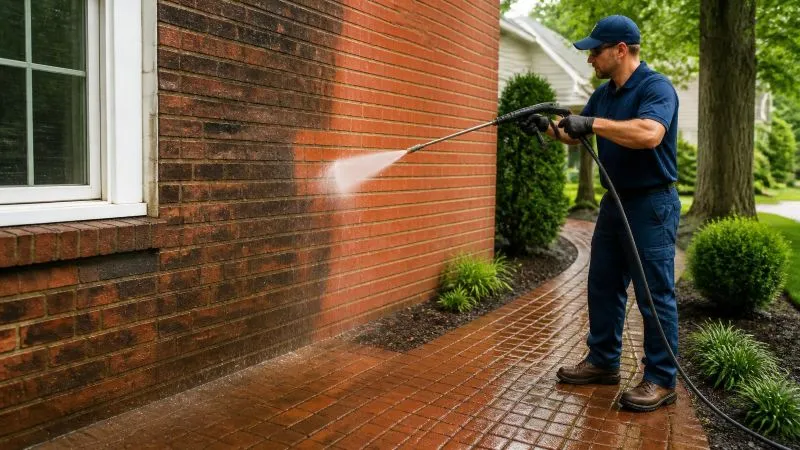
How Pressure Washing Bricks the Right Way (Do's & Don'ts)
Brick has a way of making a house look solid and timeless - until grime, algae, and years of weather buildup turn it dull and blotchy. Pressure washing bricks is one of the fastest ways to bring that curb appeal back, but bricks are more delicate than concrete or vinyl siding. Go in with the wrong settings, and you can strip mortar, crack surfaces, or leave streaks that are worse than what you started with.
This guide walks through what to do, what to avoid, and when it's smarter to just call in a pressure washing company instead of risking it yourself.
You’ll also like to read this: Pros and Cons of Pressure Washing
Key Takeaways:
Always test pressure and nozzle settings on a hidden section of brick first
Lower PSI (under 1,500-2,000) and a wide-fan nozzle are your friends
Never blast mortar joints directly or hold the nozzle too close
Bricks typically need 24-48 hours to dry fully before sealing or painting
If you're unsure, an exterior cleaning company can save you from costly mistakes
Tips on What to Do When Pressure Washing Bricks
Test a Small Area First
Before you touch the whole facade, pick an inconspicuous corner - behind a bush, near the foundation - and run your washer there. This tells you how the brick reacts at your chosen PSI without risking the parts everyone sees. Give it a minute to dry so you can actually judge the result, not just the wet appearance.
Use the Right Nozzle and PSI
Most residential pressure washers range from 1,300 to 2,800 PSI, and brick generally does best on the lower end of that scale. A 25- or 40-degree nozzle spreads the water into a wider fan, which reduces the chance of gouging or etching the surface. Skip the 0-degree "pinpoint" tip entirely - it's built for stripping paint and concrete, not for anything as porous as brick.
Pre-Treat Tough Stains
Algae, mildew, and rust stains rarely lift with water pressure alone. A mild detergent or a diluted bleach solution applied first, then left to sit for 10-15 minutes, breaks down organic growth so the washer just has to rinse it away. This also means you can use less pressure overall, which is easier on older or softer brick.
Work Top to Bottom
Gravity pulls dirty runoff downward, so starting at the top and working your way down keeps you from re-dirtying sections you already cleaned. It also gives you a more even, consistent finish across the whole wall instead of streaky patches.
Know When to Call a Pressure Washing Company
Historic brick, tall multi-story walls, or heavily crumbling mortar are situations where DIY can go sideways fast. A professional pressure washing company brings commercial-grade pressure washers, the experience to read how a specific brick type will react, and insurance in case something does go wrong. If your home's exterior is a major investment, that peace of mind is often worth the cost.
Tips on What Not to Do When Pressure Washing Bricks
Don't Use Too Much Pressure
More PSI does not mean a cleaner result - it means a higher chance of pitting, chipping, or exposing the brick's inner layers. Once that protective outer face is gone, the brick absorbs water more easily and becomes prone to cracking in freeze-thaw cycles.
Don't Hold the Nozzle Too Close
Distance matters as much as pressure. Holding the tip within a few inches of the surface concentrates the force into a tiny area, which is exactly how gouges happen. Keep the nozzle at least 12-18 inches away and let the fan spray do the work.
Don't Ignore Mortar Joints
Mortar is softer than the bricks themselves, which makes it the first thing to erode under aggressive spraying. Angle your spray to avoid blasting directly into the joints, and if the mortar already looks worn or crumbly, that's a sign to dial back pressure even further - or skip the DIY route altogether.
Don't Skip Safety Gear
Pressure washers aren't toys. The spray can drive debris into skin or eyes, and ladders combined with slick, wet surfaces are a recipe for falls. Safety glasses, closed-toe shoes, and a stable footing aren't optional extras - they're part of doing the job right.
Conclusion
Pressure washing bricks can transform a tired-looking exterior in an afternoon, but it's a job that rewards patience and the right equipment more than raw power. Test first, use lower pressure with a wide-fan nozzle, and always give mortar joints extra care. If any of that feels like more risk than you want to take on, reaching out to an exterior cleaning company is a reasonable call - they'll have the pressure washers, technique, and experience to get the job done without gambling on your home's exterior. Either way, a clean brick facade is one of the easiest upgrades to a home's curb appeal.
FAQs
What to Spray on Bricks Before Pressure Washing
A mild detergent mixed with water, or a diluted bleach solution for algae and mildew, works well as a pre-treatment. Apply it, let it sit for 10-15 minutes to break down grime and organic growth, then rinse with the pressure washer on a lower setting. This reduces the amount of raw pressure needed to get a clean result.
Is It Safe to Pressure Wash Bricks?
Yes, as long as you use appropriate pressure (generally under 1,500-2,000 PSI) and a wide-fan nozzle. Older, historic, or already-damaged brick is more sensitive and may need even gentler settings, or a professional's judgment call. When in doubt, a lower PSI is always the safer starting point.
How Long Does It Take for Brick to Dry After Pressure Washing?
Brick typically takes 24 to 48 hours to dry fully, depending on humidity, temperature, and how porous the brick is. Wait for full drying before applying any sealant, paint, or other exterior treatment - trapping moisture underneath can lead to peeling or mold down the road.
What Not to Do With a Pressure Washer
Avoid using a 0-degree pinpoint nozzle, holding the wand too close to the surface, or blasting directly into mortar joints. Skipping safety gear, working on unstable ladders, and using far more PSI than the material needs are also common mistakes that lead to damage or injury.


